

Maintenance Made Easy: Tips for Keeping Your Pneumatic Tools in Top Condition
Pneumatic tools—powered by compressed air—are workhorses in garages, construction sites, and workshops. From impact wrenches and nail guns to sanders and drills, these tools are valued for their power, durability, and lightweight design. But like any equipment, pneumatic tools need regular care to stay reliable. Neglecting maintenance can lead to jams, reduced performance, or even breakdowns—costing time and money. The good news? Keeping pneumatic tools in top shape is simple with the right habits. Let’s explore easy maintenance tips to extend their life and keep them working like new.
1. Start with Clean, Dry Air: Protect the Heart of Pneumatic Tools
Pneumatic tools rely on compressed air to function, and dirty or moist air is their worst enemy. Moisture, dust, and debris in the air supply can clog internal parts, corrode metal, and wear down seals. Here’s how to keep the air clean:
- Use inline filters and regulators: Attach a filter-regulator-lubricator (FRL) unit to your air hose near the tool. The filter traps dust and debris, the regulator controls air pressure (preventing over-pressurization), and the lubricator adds a thin layer of oil to keep parts moving smoothly. This is a must for all pneumatic tools, especially those used daily.
- Drain your compressor daily: Air compressors collect moisture from the air, which can flow into your pneumatic tools. At the end of each workday, open the drain valve on the compressor tank to release water. For humid climates or heavy use, drain it twice a day.
- Check hoses and fittings for leaks: Even small leaks let moisture and dirt sneak in. Inspect hoses for cracks, kinks, or loose fittings regularly. Replace damaged hoses immediately—don’t tape them up as a temporary fix, as this can trap debris.
- Keep air intake clean: The compressor’s air intake filter (usually on the side) traps dust. Clean it monthly with a soft brush or replace it if it’s clogged. A dirty filter forces the compressor to work harder, sending less efficient air to your pneumatic tools.
2. Lubricate Regularly: Keep Pneumatic Tools Moving Smoothly
Pneumatic tools have moving parts—pistons, valves, and gears—that need lubrication to reduce friction and prevent wear. Without oil, these parts can grind against each other, causing overheating and damage.
- Oil before and after use: Most pneumatic tools need a few drops of pneumatic tool oil in the air inlet before each use. For heavy use (e.g., 8+ hours a day), add a drop or two halfway through the day. After use, add a couple more drops to protect parts while stored.
- Use the right oil: Never use motor oil, cooking oil, or WD-40. These can gum up internal parts or damage rubber seals. Stick to oil labeled “pneumatic tool oil” or “air tool oil”—it’s designed to resist breakdown under pressure and temperature changes.
- Don’t over-lubricate: Too much oil can build up inside the tool, attracting dust and causing clogs. Follow the manufacturer’s guidelines—usually 2–3 drops per use is enough.
- Lubricate attachments too: Bits, nails, or sanding pads that connect to pneumatic tools also need care. Wipe them clean and apply a light coat of oil to metal parts to prevent rust.
3. Clean Pneumatic Tools After Every Use
Dirt, dust, and debris are enemy number one for pneumatic tools. They can clog air vents, scratch moving parts, and wear down seals. A quick clean after use goes a long way:
- Wipe down the exterior: Use a clean, dry cloth to remove dust, dirt, or grease from the tool’s surface. For sticky residue (like paint or glue), dampen the cloth with mild soap and water—avoid harsh chemicals that can damage plastic or rubber parts.
- Clear air vents: Pneumatic tools have vents to release heat. If these get clogged with sawdust, dirt, or debris, the tool can overheat. Use a soft brush or compressed air (on low pressure) to blow out vents—never stick sharp objects inside, as this can damage internal parts.
- Clean attachments: For tools like nail guns, remove the nail magazine and wipe out any 木屑 (wood chips) or debris. For sanders, clean the sanding pad to remove dust buildup, which can reduce grip and performance.
- Deep clean periodically: Every few months (or more often for heavy use), disassemble the tool (if comfortable) to clean hard-to-reach areas. Follow the manufacturer’s manual to avoid damaging parts—focus on removing dirt from valves, pistons, and O-rings.
4. Inspect for Wear and Damage
Catching small issues early prevents costly repairs or replacements. Make a habit of inspecting your pneumatic tools before and after use:
- Check hoses and fittings: Look for cracks, bulges, or fraying in hoses. Ensure fittings are tight—loose connections cause air leaks, reducing tool power and wasting energy. Replace any damaged hoses or fittings immediately.
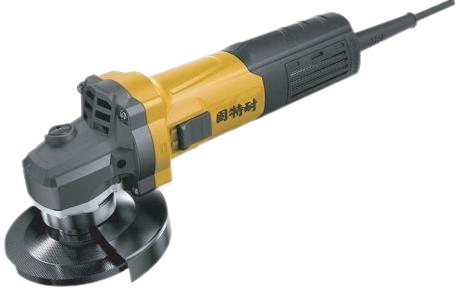
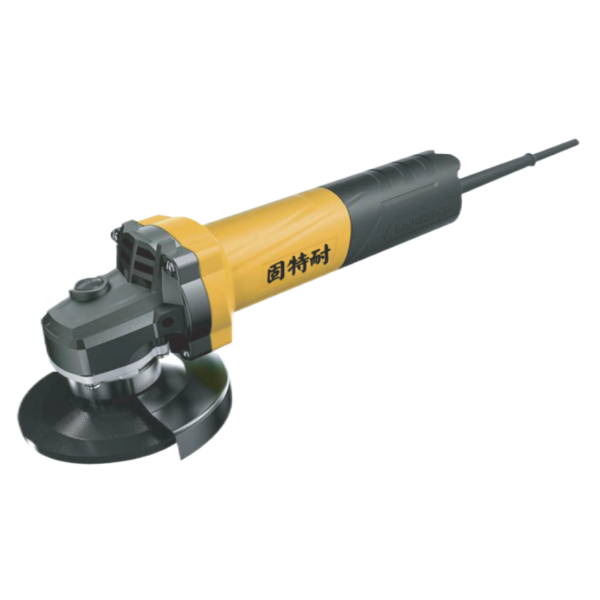
- Examine moving parts: For tools like impact wrenches or grinders, check the spindle (the part that holds attachments) for wobbling or excessive play. Wobbling means bearings are worn and need replacement.
- Test triggers and controls: Triggers should move smoothly and “click” when engaged. If a trigger sticks or feels loose, it may need cleaning or a new spring—don’t use the tool until it’s fixed, as it could malfunction.
- Look for air leaks: A hissing sound when the tool is connected to air (but not in use) means a leak. Spray soapy water on fittings and hoses—bubbles will form where the leak is. Tighten fittings or replace parts to fix it.
- Check seals and O-rings: These rubber parts prevent air leaks. If they’re cracked, hardened, or missing, the tool will lose power. Most pneumatic tools come with replacement O-rings in repair kits—swap them out at the first sign of wear.
5. Store Pneumatic Tools Properly
How you store your pneumatic tools when not in use affects their lifespan. Even a few days of poor storage can cause rust or damage:
- Keep them dry: Moisture causes rust, so store pneumatic tools in a dry area. If your workshop is humid, use a dehumidifier or store tools in a sealed container with desiccant packs (to absorb moisture).
- Avoid extreme temperatures: Don’t leave pneumatic tools in freezing garages or hot trucks. Extreme cold can make rubber parts brittle, while heat can break down lubricants. A room-temperature, shaded area is best.
- Disconnect from air supply: Always unplug the air hose when storing tools. This prevents accidental activation and reduces pressure on internal parts.
- Hang or organize: Use a tool rack or pegboard to keep pneumatic tools off the floor, where they can get stepped on or covered in debris. Coil hoses loosely to avoid kinks—kinks weaken the hose over time.
- Long-term storage: If storing pneumatic tools for weeks or months, add a few extra drops of oil to internal parts. Cover tools with a clean cloth to keep dust out.
6. Use Pneumatic Tools Correctly
Proper use is part of maintenance—misusing tools causes unnecessary wear and damage:
- Match the tool to the job: Don’t use a small pneumatic nail gun for heavy-duty framing, or a grinder for cutting thick metal. Using the wrong tool strains motors and parts, leading to breakdowns.
- Stay within air pressure limits: Each tool has a recommended PSI (pounds per square inch) range (check the manual). Exceeding this pressure overloads internal parts, while too little pressure reduces performance and can cause jams. Use a regulator to set the right pressure.
- Don’t force the tool: If a pneumatic tool struggles (e.g., a drill getting stuck in wood), stop and check the issue. Forcing it can burn out motors or bend parts.
- Use quality attachments: Cheap, ill-fitting attachments (like drill bits or sanding pads) cause vibration and stress, wearing down the tool. Stick to attachments designed for your specific pneumatic tool.
FAQ
How often should I oil my pneumatic tools?
Add 2–3 drops of pneumatic tool oil before each use. For heavy use (8+ hours a day), add a few drops halfway through the day. After use, add a couple more drops to protect parts.
What are the signs my pneumatic tool needs maintenance?
Common signs include reduced power, strange noises (grinding, hissing), triggers sticking, air leaks, or overheating. If you notice any, stop using the tool and inspect it.
Can I use motor oil in pneumatic tools?
No. Motor oil is too thick and can damage rubber seals or clog internal parts. Use only oil labeled “pneumatic tool oil” or “air tool oil.”
How do I check for air leaks in my pneumatic tool setup?
Spray soapy water on hoses, fittings, and the tool’s air inlet. Turn on the compressor—bubbles will form where air is leaking. Tighten fittings or replace damaged parts to fix leaks.
Is it okay to store pneumatic tools in a cold garage?
Extreme cold can make rubber seals brittle. If storing in a cold area, bring tools indoors to warm up before use—this prevents seal damage when air pressure is applied.
How long do pneumatic tools last with proper maintenance?
With regular care, most pneumatic tools last 5–10 years. Heavy-use tools (construction-grade) can last even longer if maintained well.
What should I do if my pneumatic tool gets wet?
Dry it immediately with a cloth. Add extra oil to internal parts to displace moisture. Let it sit in a dry area for 24 hours before use to prevent rust.
Table of Contents
- Maintenance Made Easy: Tips for Keeping Your Pneumatic Tools in Top Condition
- 1. Start with Clean, Dry Air: Protect the Heart of Pneumatic Tools
- 2. Lubricate Regularly: Keep Pneumatic Tools Moving Smoothly
- 3. Clean Pneumatic Tools After Every Use
- 4. Inspect for Wear and Damage
- 5. Store Pneumatic Tools Properly
- 6. Use Pneumatic Tools Correctly
-
FAQ
- How often should I oil my pneumatic tools?
- What are the signs my pneumatic tool needs maintenance?
- Can I use motor oil in pneumatic tools?
- How do I check for air leaks in my pneumatic tool setup?
- Is it okay to store pneumatic tools in a cold garage?
- How long do pneumatic tools last with proper maintenance?
- What should I do if my pneumatic tool gets wet?