 EN
EN


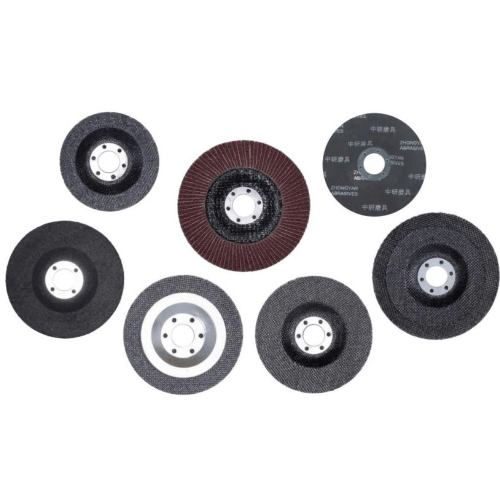
Selecting the correct polishing head for a given material is one of the most consequential decisions a craftsman, contractor, or fabricator can make. Use the wrong type and you risk surface damage, tool wear, inefficient results, or even safety hazards. Yet the market offers dozens of configurations, abrasive compositions, bond types, and profiles, all of which behave differently depending on what they come into contact with. The challenge is not simply picking something that fits your angle grinder or floor machine — it is understanding which polishing head design is genuinely engineered for your specific substrate and the finish you need to achieve.
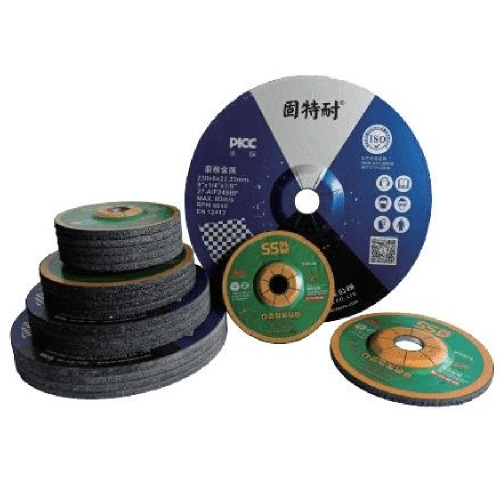
This guide breaks down the selection logic across four of the most commonly worked surfaces in industrial and construction environments: stone, metal, concrete, and wood. Each material demands a different approach to abrasive chemistry, grit progression, disc geometry, and operating speed. By examining these material-specific requirements in depth, you will be equipped to make a precise, informed choice rather than relying on guesswork or generic product descriptions. Whether you are refinishing marble countertops, preparing steel components for coating, grinding a warehouse floor, or smoothing hardwood furniture, the right polishing head makes the difference between a professional result and a frustrating setback.
Understanding What a Polishing Head Actually Does
The Mechanics Behind Surface Finishing
A polishing head is not a passive accessory — it is an active cutting and refining tool that removes microscopic layers of material through controlled abrasion. The abrasive particles embedded in the disc or pad cut ridges into the surface, and each successive grit level replaces those ridges with finer ones until the surface achieves the desired smoothness or sheen. Understanding this progressive material removal process is essential before matching any polishing head to a specific substrate.
The geometry of the head also matters enormously. Flat profiles distribute pressure evenly, which suits large, open surfaces. Convex or contoured shapes concentrate pressure at a central point, enabling edge work and detail finishing. A cymbal-shaped or domed profile, for instance, performs exceptionally well on curved stone or contoured architectural elements because it maintains consistent contact pressure even as the angle shifts. The bond hardness of the abrasive matrix determines how quickly fresh grit is exposed as the tool wears, and this needs to match the hardness of the material being polished.
Equally important is the backing system. A rigid backing delivers aggressive, even stock removal. A flexible or foam-backed polishing head conforms to surface irregularities and is better suited to finishing stages where consistency of surface contact is more important than material removal rate. Recognizing these mechanical principles allows you to evaluate tool specifications with real discernment rather than relying on marketing language alone.
Key Variables That Define the Right Selection
Before you commit to any polishing head, you need to evaluate five core variables: substrate hardness, required finish level, surface geometry, operating equipment, and wet or dry working conditions. Substrate hardness directly influences grit selection and bond type — harder materials require softer bonds that release worn abrasive grains quickly, while softer materials need harder bonds to prevent excessive tool wear. Required finish level determines your grit progression from coarse stock removal through to ultra-fine polishing.
Surface geometry tells you whether a flat, flexible, or profiled polishing head is appropriate. A flat concrete floor and a carved marble sink require completely different head configurations even if the same machine is used. The operating equipment — its RPM range, spindle thread size, and power output — must also be compatible with the head you select, as running a disc beyond its rated speed compromises both finish quality and operator safety. Finally, wet polishing typically requires diamond-resin or electroplated heads designed to handle coolant, while dry systems demand heads with adequate heat dissipation to prevent glazing or burning.
Choosing a Polishing Head for Stone Surfaces
Why Stone Demands Specialized Abrasive Chemistry
Stone — whether marble, granite, travertine, limestone, or quartzite — presents a unique challenge because its mineral composition varies dramatically even within a single slab. Granite contains hard quartz crystals alongside softer feldspar, meaning an abrasive that cuts well through one mineral may simply skate across another. A properly engineered polishing head for stone uses a resin bond with diamond abrasive particles, which provides enough hardness to cut quartz while offering the flexibility needed for the smoother mineral zones.
The grit sequence for stone polishing typically begins at 50 or 100 grit for scratch removal and surface leveling, then progresses through 200, 400, 800, 1500, and 3000 grit stages before applying a final buffing pad. Skipping grits leads to deep scratches that cannot be resolved at the polishing stage without backtracking. A high-quality polishing head designed for stone will maintain consistent cutting performance throughout its full grit range without loading up with stone dust or generating localized heat that can cause micro-fractures.
For profiled stone edges or curved architectural details, a polishing head with a cymbal or domed profile is particularly well-suited. The convex shape allows the abrasive surface to maintain consistent contact as the operator works around bullnose edges, ogee profiles, or sculpted basin interiors. This dramatically reduces the risk of flat spots or uneven scratch patterns that are nearly impossible to resolve at later stages.
Wet Versus Dry Polishing Considerations for Stone
Stone polishing is almost always performed wet when the goal is a high-gloss finish. Water serves as both a lubricant and a coolant, preventing the resin bond from overheating and the stone surface from thermal stress cracking. A polishing head used in wet conditions must have open segment structures or ventilation channels that allow water to flow freely across the abrasive face, carrying away slurry and maintaining consistent cutting action.
Dry stone polishing is possible but is generally limited to light honing or surface preparation work rather than full polishing sequences. In dry conditions, the polishing head must have higher heat resistance and should be operated at lower RPMs with intermittent contact to prevent burning. Many fabricators compromise by using a mist spray rather than full wet polishing, which works reasonably well for medium-hard stones like limestone but is insufficient for hard granites where full water flow is necessary to achieve a mirror finish.
Choosing a Polishing Head for Metal Surfaces
Abrasive Types and Their Role in Metal Finishing
Metal finishing is a broad category that encompasses everything from weld seam blending on stainless steel to mirror polishing of aluminum automotive components. The appropriate polishing head for metal depends heavily on the metal type, the starting condition of the surface, and the target finish specification. Steel, aluminum, copper, and brass each respond differently to the same abrasive, and using the wrong compound or disc type will either underperform or actively damage the surface.
For aggressive metal stock removal — such as flap discs for weld grinding — the polishing head will use zirconia or ceramic alumina abrasive grains embedded in a layered flap configuration. These provide fast, cool cutting and durability. As the work progresses into finishing stages, the transition moves toward non-woven abrasive pads or felt bobs loaded with polishing compound. Each stage uses a different polishing head designed specifically for that phase of the process rather than trying to force a single tool through the entire sequence.
For stainless steel in particular, it is critical to use abrasive products that do not contain iron or sulfur contamination, as these elements can embed into the surface and cause rust spots that compromise corrosion resistance. A dedicated stainless-safe polishing head uses aluminum oxide or ceramic abrasive in a clean resin bond and should never be used interchangeably with discs that have been used on carbon steel.
Matching Grit and Profile to Metal Finishing Goals
The grit progression for metal polishing follows the same fundamental logic as other materials but with different starting and ending points depending on the goal. A weld preparation task might start at 36 or 60 grit to remove the raised bead, progress through 80, 120, and 180 to blend the surface, and finish with a non-woven abrasive disc at the equivalent of 320 or 400 grit for a satin appearance. Achieving a mirror finish on metal requires continuing through 600, 800, 1200, and then applying polishing compound on a soft cotton or foam polishing head.
Profile selection for metal is often dictated by part geometry. A flat disc works well on sheet metal panels. A shaped or contoured polishing head is necessary for tube interiors, machined fittings, or decorative hardware. The backing flexibility also matters — a fully rigid backing is too aggressive for thin-gauge sheet metal and can create gouging or warping, while a medium-flex backing distributes pressure more evenly across slightly uneven surfaces.
Choosing a Polishing Head for Concrete Surfaces
The Unique Demands of Concrete Grinding and Polishing
Concrete polishing has become a significant industry in its own right, covering warehouse floors, retail spaces, countertops, and decorative overlays. Concrete is a composite material containing aggregate of varying hardness, cement paste, and often added reinforcements, all of which create an unpredictable surface from an abrasive standpoint. The correct polishing head for concrete must handle hard aggregate inclusions without glazing over, while still refining the softer cement paste between them.
Metal bond diamond tooling is the standard choice for the initial concrete grinding stages. The metal matrix holds diamond segments firmly while the floor machine applies high pressure to remove surface laitance, coatings, or major unevenness. As the process moves through coarser to finer grits, the tool transitions to a hybrid or resin bond polishing head that provides a finer scratch pattern and ultimately produces the characteristic reflective sheen of a polished concrete floor.
Concrete hardness varies widely depending on its mix design and curing age. Soft concrete requires a harder bond segment to avoid the abrasive wearing away too quickly before it can accomplish useful work. Hard concrete requires a softer bond that releases worn diamonds continuously to expose fresh cutting edges. Misjudging concrete hardness is one of the most common reasons for poor performance from an otherwise well-specified polishing head.
Transitioning Through Grit Stages on Concrete
A standard concrete polishing sequence might begin with a 30 or 50 grit metal bond polishing head to remove the surface layer and expose aggregate. Following this, 100 and 200 grit transition tools refine the scratch pattern and begin building density in the surface. After densifier application — which chemically hardens the concrete — resin bond tools from 400 through 3000 grit develop reflectivity, and a final burnishing pad brings the floor to its maximum gloss level.
Each stage requires the correct polishing head type, not just the correct grit number. Using a resin bond tool in the early stages will result in rapid wear and poor cutting. Using a metal bond tool in the finishing stages will leave deep scratches that cannot be resolved by subsequent polishing. The transition points in a concrete polishing sequence are just as critical as the individual tool choices, and respecting them is the difference between a successful and a failed project.
Choosing a Polishing Head for Wood Surfaces
Wood's Sensitivity to Abrasive Choice and Pressure
Wood is the most forgiving material in terms of hardness but the most demanding in terms of surface sensitivity. A polishing head that is too aggressive will tear wood fibers rather than cut them cleanly, leaving a fuzzy or scratched surface that absorbs stain unevenly and looks unprofessional regardless of the finish coat applied. Wood also contains both soft earlywood and harder latewood within the same growth ring, meaning an abrasive must cut both zones at a consistent rate to avoid creating an uneven surface topography.
Silicon carbide and aluminum oxide are the two primary abrasive types used in wood-finishing polishing head products. Silicon carbide is sharper and more friable, making it excellent for cutting through hard finish coats between layers. Aluminum oxide is tougher and more durable, making it the preferred choice for raw wood sanding before finishing. The grit range for wood finishing typically spans from 60 or 80 grit for heavy material removal or paint stripping, through 120, 180, and 220 for surface preparation, and up to 320 or 400 for between-coat finish work.
Backing flexibility is particularly important for wood because surfaces are rarely perfectly flat. A rigid polishing head will bridge across slight undulations in a wood panel and leave the high spots cut while the low spots are untouched. A foam-backed or flexible abrasive disc conforms to the wood surface and provides consistent contact across the entire working area, which is essential for producing an even surface ready for finishing.
Avoiding Common Mistakes in Wood Polishing
One of the most common errors when polishing or sanding wood is using a polishing head designed for another material. Diamond discs intended for stone will load up immediately with wood fiber and resin, becoming useless within seconds. Metal-bond tools create far too aggressive a scratch pattern for any wood application. Even using a general-purpose abrasive disc rather than a wood-specific product often leads to burning, loading, and uneven results.
Proper grit progression is equally critical on wood. Jumping from 80 grit to 220 grit skips necessary scratch removal steps, leaving deep 80-grit scratches visible under the finish coat. The scratches may not be apparent on the raw wood surface but become highly visible once a stain or clear coat is applied. Using the correct polishing head at each grit level in proper sequence is the fundamental practice that separates quality wood finishing from amateur results.
Rotational speed is another key variable. Wood polishing heads generally perform best at lower RPM settings than stone or metal tools. Running a sanding disc too fast on wood generates frictional heat that scorches the surface, melts any resin or finish present, and causes abrasive loading. A variable-speed machine set to the manufacturer's recommended speed for the specific polishing head in use gives the most consistent, damage-free results on wood.
FAQ
Can the same polishing head be used across different materials?
In most cases, no. Each material — stone, metal, concrete, and wood — has distinct hardness characteristics, abrasive chemistry requirements, and surface sensitivity. Using a polishing head designed for one material on another typically results in poor performance, rapid tool wear, or surface damage. There are some general-purpose abrasive discs that offer moderate performance across softer materials, but for professional results, material-specific tooling is always the better choice.
How do I know when to move to the next grit in a polishing sequence?
The standard practice is to examine the surface under raking light before advancing to the next grit. The surface should show a completely uniform scratch pattern from the current polishing head, with no visible scratches from the previous, coarser stage remaining. If deep scratches are still present, continuing with the current grit is necessary before progressing. Rushing through grit stages is one of the most common causes of poor finish results across all material types.
What does the bond type on a polishing head actually mean for performance?
The bond type refers to the matrix that holds the abrasive particles in place. A metal bond holds diamonds very firmly and is suited for heavy stock removal on hard materials like concrete or granite. A resin bond is softer and releases worn abrasive grains more readily, making it better for finishing stages where a finer scratch pattern is needed. The correct bond for any given application depends on both the material hardness and the stage of the polishing process, which is why understanding bond types is central to selecting the right polishing head.
Is wet or dry polishing better for stone and concrete?
Wet polishing is generally superior for hard materials like granite and dense concrete because water acts as a coolant and lubricant, preventing heat buildup that can damage both the surface and the polishing head itself. Dry polishing is more convenient and is acceptable for softer stones, porous concrete, or situations where water use is impractical, but it requires lower operating speeds and careful technique to avoid burning or glazing the surface.